
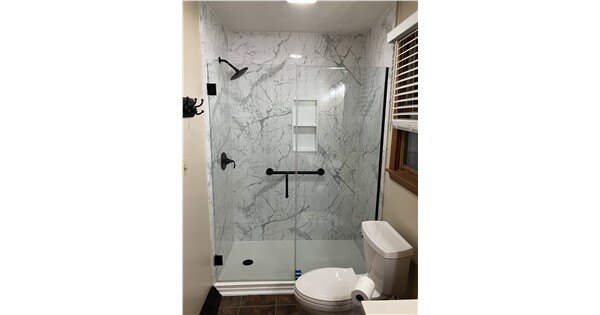
Executive Summary
A new bathtub or shower installation usually involves more than removing the old fixture and putting a new one in its place.
For a typical Joyce bath or shower project, the process may include:
- Protecting the path from the entrance to the bathroom
- Removing the existing tub, shower, and contracted wall materials
- Opening the wet area so the underlying space can be inspected
- Evaluating and adjusting plumbing as needed
- Preparing and setting the new tub or shower base
- Installing moisture-resistant backing
- Measuring, cutting, and fitting the new wall system
- Installing fixtures, shelving, seating, grab bars, and other selected accessories
- Installing or measuring for the shower enclosure
- Sealing the completed system
- Cleaning the work area
- Completing a homeowner walkthrough
Many Joyce wet-area installations are planned around approximately two installation days, but every bathroom is different. Older plumbing, concealed water damage, structural repairs, drain relocation, custom glass, and a broader bathroom refresh can extend the timeline.
Before installation day, homeowners can help by clearing the bathroom, creating an open path through the home, protecting personal belongings, planning for pets and children, and identifying a suitable work area when requested.
Planning a bath or shower remodel? Use the Joyce Bath Project Estimator for a ballpark price or book a design consultation to review your bathroom and project options.
How Long Does a New Bath or Shower Installation Take?
There is no single installation time that applies to every bathroom.
For many Joyce projects focused on replacing the wet area—the tub or shower, surrounding walls, fixtures, and selected accessories—the installation is commonly planned around two days. Joyce uses that time to remove the existing materials, inspect the exposed space, prepare the new system, and complete the installation rather than simply covering the existing walls.
A project may take longer when installers encounter:
- Older cast-iron tubs
- Thick tile or plaster
- Mud-set wall construction
- Galvanized or cast-iron plumbing
- Water damage
- Rot or deteriorated framing
- Drain locations that need to change
- Concrete slab work
- Structural repairs
- Electrical changes
- Custom shower glass
- Flooring, vanity, toilet, or other bathroom-refresh work
A custom glass shower enclosure may also require a separate return visit because the final measurements are often taken after the new walls and shower base are installed. Joyce currently confirms that custom-measured glass doors are measured after the shower walls are in place.
Your project consultant should explain the expected schedule before work begins and identify which conditions could change it.
Bath and Shower Installation at a Glance
| Stage | What Typically Happens | What the Homeowner Should Know |
|---|---|---|
| Home protection | Crews protect floors and the route to the bathroom | Clear the path before arrival |
| Demolition | Existing wet-area materials are removed as contracted | Older materials can take longer to remove |
| Inspection | Exposed plumbing and wall areas are evaluated | Hidden conditions may affect the project |
| Plumbing | Valve, supply, or drain work is completed as needed | Older plumbing may require additional adaptation |
| Base or tub installation | New shower base or bathtub is positioned and secured | Support materials may need time to set |
| Wall preparation | Moisture-resistant backing is installed | What is behind the finished wall matters |
| Wall installation | Custom wall panels are measured, cut, and installed | Exact fitting occurs in the home |
| Accessories | Fixtures, shelves, seating, grab bars, and other selections are installed | Confirm placement before permanent installation |
| Shower enclosure | Curtain rod, standard enclosure, or measurements for custom glass are completed | Custom glass may require another visit |
| Sealing and cleanup | Seams are sealed and the bathroom is cleaned | Ask how long to wait before using the shower |
| Final walkthrough | Installer demonstrates the completed system | Ask about cleaning, operation, warranty, and service |
How Should You Prepare for Bath or Shower Installation?
Homeowners do not need to prepare the bathroom like a construction crew would. In most cases, the most useful preparation is simply making the work area easy to access.
1. Remove Personal Items From the Bathroom
Before the installation crew arrives, remove items from:
- The bathtub or shower
- Shelves
- Counters near the work area
- The toilet tank
- The floor
- Window sills
- Open storage near the wet area
Move toiletries, towels, medications, cosmetics, toothbrushes, decorations, rugs, scales, and other personal belongings somewhere protected from dust.
If cabinets or drawers are outside the work area, ask whether they need to be emptied.
2. Clear a Path to the Bathroom
The installation team may need to carry:
- Wall panels
- A bathtub or shower base
- Tools
- Protective materials
- Plumbing supplies
- Removed construction material
Clear the route from the entrance to the bathroom.
Move:
- Small tables
- Floor lamps
- Shoes
- Toys
- Pet bowls
- Decorative objects
- Fragile items
3. Check Nearby Walls for Fragile Decorations
Demolition can create vibration.
Remove valuable or fragile pictures, mirrors, shelves, and decorations from walls immediately adjacent to the bathroom when there is a chance they could be disturbed.
This is especially useful in older homes where removing tile, plaster, or a cast-iron tub may require heavier demolition.
4. Plan for Children and Pets
Keep children and pets away from the work area.
Installers may be carrying heavy materials and using power tools, and doors may need to remain open while materials move into and out of the house.
Arrange a safe room for pets or consider having them stay elsewhere during active installation.
5. Identify a Work Area If Requested
Joyce may ask for access to a garage, driveway, or another appropriate location where installers can measure and cut project materials. The live installation guide specifically recommends identifying this type of workspace when possible.
Do not assume the crew needs a particular area. Ask your project coordinator what will be required before installation day.
6. Make a Plan for Bathroom Access
If the project affects your home's only full bathroom, ask before installation:
- When will the toilet be unavailable?
- When will the water need to be shut off?
- Will water be restored at the end of each workday?
- When can the new shower or tub first be used?
- Will another bathroom remain available?
Never assume the new shower can be used immediately after the crew leaves. Sealants, adhesives, mortar, and other materials may require a specific curing period.
Follow the installer's instructions for your exact system.
7. Take Before Photos
Before photos are useful for more than showing the transformation.
Photograph: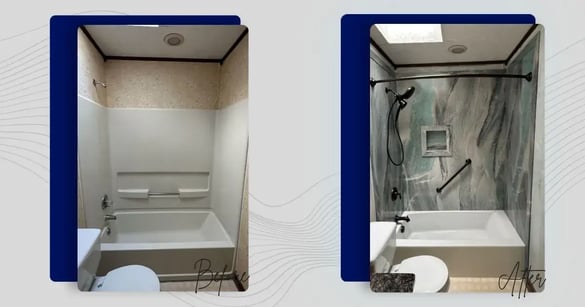
- The full bathroom
- Existing tub or shower
- Fixtures
- Walls
- Floor
- Ceiling
- Adjacent trim
- Any existing damage
They provide a record of the original condition and make it easier to appreciate the completed project.
What Happens When the Installation Crew Arrives?
A professional installation should begin with preparation rather than immediate demolition.
Joyce's current process includes introducing the crew, protecting the route to the bathroom, reviewing the surrounding area, and preparing the workspace before removal begins.
This is a good time to confirm:
- Which bathroom is being remodeled
- Where materials will enter the home
- Where installers will work
- Which fixtures and accessories are being installed
- Where grab bars or seating will be placed
- Whether water will be shut off
- The expected schedule for the day
If something appears different from the written project agreement, ask before demolition begins.
What Happens During Demolition?
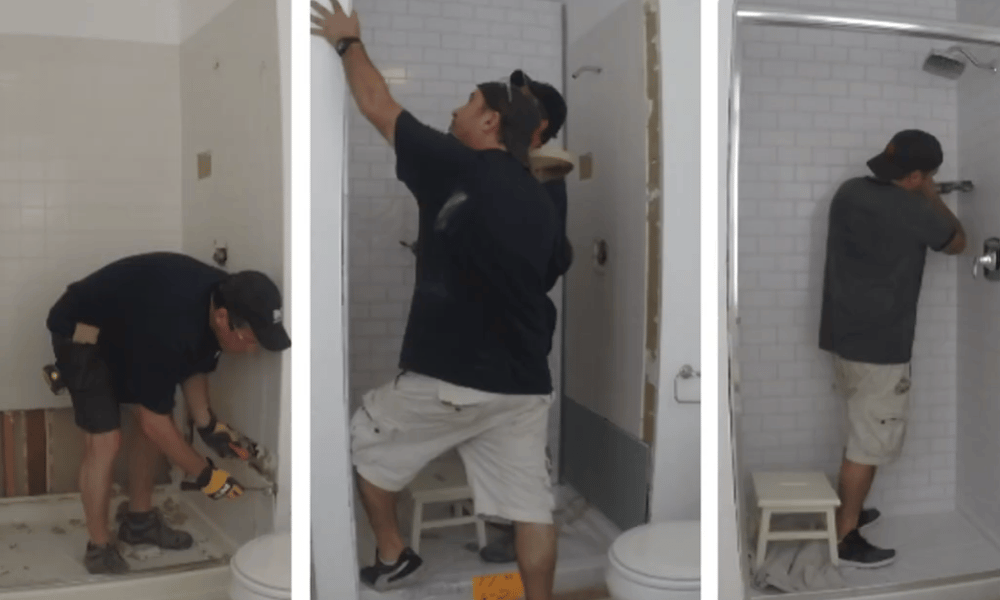
The existing wet area is removed according to the contracted project scope.
For a Joyce bath or shower installation, that may mean removing the existing:
- Bathtub or shower base
- Wall surround
- Tile
- Drywall or other wall material
- Fixtures
- Plumbing trim
- Shower enclosure
The goal is to expose enough of the underlying area to prepare it correctly for the new system.
Joyce's current process emphasizes removing existing wet-area materials down to the underlying wall structure so the area can be inspected before the new system is installed.
Why can demolition take longer in an older bathroom?
Not every old bathroom was built the same way.
Joyce's installation teams have encountered bathrooms containing:
- Fiberglass surrounds that can be removed relatively quickly
- Heavy cast-iron tubs
- Tile installed over thick mortar
- Plaster construction
- Older plumbing hidden behind walls
A simple fiberglass removal and a decades-old mud-set tile bathroom should not be expected to take the same amount of time.
This is one reason an installation schedule should allow for real conditions rather than promise that every bathroom will be completed in exactly the same number of hours.
What Happens After the Old Tub or Shower Is Removed?
Once the wet area is open, installers can see conditions that were previously hidden.
They may evaluate:
- Plumbing
- Drain location
- Wall condition
- Framing
- Signs of moisture
- Previous repairs
- Level and square
- Subfloor or base conditions
This inspection is one of the most important parts of the project.
A finished shower can look beautiful while still having problems underneath it if the preparation was poor.
That is why homeowners should ask a remodeler whether the old wet area will actually be removed or whether the new system is being installed over existing materials.
What Happens If the Installer Finds Hidden Damage?
Hidden conditions cannot always be identified during a design consultation.
Once demolition begins, installers may find:
- Water-damaged wood
- Deteriorated wall material
- Plumbing problems
- Improper previous repairs
- Corrosion
- Unexpected framing
- Drain problems
The contractor should explain the condition, the recommended correction, whether it changes the scope of work, and whether additional cost or time is involved.
Ask for any significant changes in writing.
The Federal Trade Commission recommends that homeowners use written contracts and estimates that clearly identify the work, materials, price, and other important project terms.
What Plumbing Work Happens During Installation?
After the old system is removed, the plumbing can be evaluated.
Depending on the project, work may include:
- Replacing the shower or tub valve
- Connecting new fixtures
- Adjusting supply lines
- Connecting a new drain
- Changing the drain position for a tub-to-shower conversion
- Adapting older plumbing
Older galvanized or cast-iron plumbing can require additional work compared with more modern piping. It also notes that moving a drain in a concrete slab can be considerably more involved than repositioning a drain where plumbing is easily accessible.
Do not assume major plumbing relocation is included unless it appears in your written proposal.
How Is the New Tub or Shower Base Installed?
Once the underlying area and plumbing are ready, the new bathtub or shower base can be set.
Depending on the approved system, installers may use a support or setting material beneath the base to create a solid foundation.
The goal is to make sure the new tub or shower base is:
- Correctly positioned
- Level
- Properly supported
- Connected to the drain
- Ready for the wall system
The exact installation method should follow the requirements for the selected bath or shower product.
What Goes Behind the New Shower Walls?
The finished wall panels are only the visible part of the system.
Joyce currently installs moisture-resistant backing before fitting the bath or shower wall panels. Its educational material describes using moisture- and mold-resistant wallboard behind its bath systems rather than simply attaching finished panels over deteriorated existing surfaces.
This preparation matters because bathrooms are high-moisture environments.
Homeowners should ask any remodeler:
- What will be removed?
- What material will go behind the new walls?
- How will the wall surface be prepared?
- How are seams handled?
- How will plumbing penetrations be sealed?
- Will damaged underlying materials be repaired first?
What you cannot see after the remodel can be just as important as the surface you can.
Related Article: Purple Wood vs Plywood
How Are Joyce SignatureStone Walls Installed?
Joyce currently offers SignatureStone bath and shower wall systems as part of its remodeling services. The system is designed to provide a stone-inspired appearance without traditional rows of grout.
After the backing and base are prepared, installers:
- Measure the actual wall area
- Cut panels for the space
- Fit them around plumbing and other features
- Secure the wall system
- Finish edges and seams
- Install selected accessories
Because walls and homes are not always perfectly square, fitting occurs around the real dimensions of the bathroom rather than assuming every opening is identical.
Related Article: Signature Stone vs Acrylic
When Are Shelves, Grab Bars, and Seats Installed?
Accessories are typically installed as the new shower or tub system is being completed.
Depending on the design, homeowners may have selected:.jpg?width=318&height=424&name=Eevins%20Bath%20(1%20of%203).jpg)
- Shelving
- Corner storage
- Grab bars
- Built-in or fold-down seating
- Handheld showerheads
- Showerheads
- Faucets
- Shower rods
- Doors
- Other bath accessories
Confirm locations before permanent installation.
A grab bar or shower seat should be positioned around how the homeowner will actually use the space, not simply where it looks symmetrical in a photograph.
Joyce currently offers these types of safety and convenience accessories across its bath and shower remodeling options.
Related Article: Bathroom Upgrade Options
When Is the Shower Door Installed?
It depends on the enclosure.
Some shower doors may be installed as part of the initial project.
A custom glass enclosure often requires another step.
Joyce currently explains that custom glass doors are measured after the shower walls are installed so measurements reflect the completed opening.
That may mean:
- The shower system is completed.
- Final measurements are taken.
- The glass is made to those dimensions.
- A return appointment is scheduled for installation.
Ask whether a temporary shower curtain can be used while the custom enclosure is being completed and when the shower itself can safely be used.
What Happens at the End of the Installation?
The final phase should include more than packing up the tools.
Joyce's current process includes sealing the completed system, cleaning the work area, and completing a final walkthrough with the homeowner.
During the walkthrough, ask the installer to show you:
- How the fixtures operate
- How a handheld shower works
- How doors or enclosures operate
- How seating operates, if applicable
- How the drain functions
- How to clean the wall system
- Which cleaners to avoid
- When the shower or tub can first be used
- What warranty documents apply
- Who to contact for service
Do not hesitate to point out an issue during the walkthrough.
It is easier to discuss a question while the installation team is still present.
How Long Should You Wait Before Using a New Shower?
Follow the instructions provided for your exact installation.
Sealants, adhesives, mortar, and other materials may need time to cure before they are exposed to water or normal use.
The correct wait time depends on the products used and installation conditions.
Before the crew leaves, ask:
“What time and day can I safely use the new tub or shower?”
Write the answer down.
Do not use a generic internet cure time when your installer has provided product-specific instructions.
What Should You Check Before the Installers Leave?
Use this quick final walkthrough:
- Tub or shower base feels stable
- Hot and cold water operate correctly
- Drain works properly
- Showerhead and handheld fixtures operate
- Doors open and close correctly
- Shelves and accessories are secure
- Grab bars are secure
- Seating operates correctly, if included
- Wall seams appear complete
- Care instructions have been explained
- First-use time has been confirmed
- Warranty information has been provided
- Service contact information is clear
Take completed-project photographs after the walkthrough.
What Should Be in Your Bathroom Remodeling Contract?
Before installation day arrives, make sure the written agreement identifies the major project details.
The Federal Trade Commission recommends getting home-improvement work in writing, including the work to be performed, materials, price, and expected completion information.
For a bath or shower remodel, your agreement should make clear:
- Project type
- Tub or shower model
- Wall system
- Wall color or pattern
- Fixtures and finishes
- Shelves
- Grab bars
- Seating
- Door or enclosure
- Demolition scope
- Plumbing scope
- Included repairs
- Flooring, vanity, or toilet work when applicable
- Cleanup
- Project price
- Payment terms
- Warranty
- Important exclusions
If the contract does not match what you think you purchased, resolve the difference before work begins.
How Is a Wet-Area Remodel Different From a Full Bathroom Remodel?
This distinction affects both the installation timeline and what homeowners should expect.
Wet-area remodel
A wet-area project focuses primarily on:
- Bathtub
- Shower
- Surrounding walls
- Fixtures
- Enclosure
- Accessories
This is the type of project covered most directly by this installation guide.
Bathroom refresh
Joyce may also offer selected additional improvements depending on the project, such as:
- Flooring
- Vanity
- Toilet
- Other coordinated updates
Joyce currently describes its bath offering as wet-area remodeling with select broader bathroom-refresh options.
Full bathroom renovation
A more extensive renovation may involve:
- Layout changes
- Significant plumbing relocation
- Electrical work
- Cabinetry
- Drywall
- Lighting
- Flooring
- Painting
- Structural work
That type of project should not be expected to follow the same schedule as a straightforward bath or shower replacement.
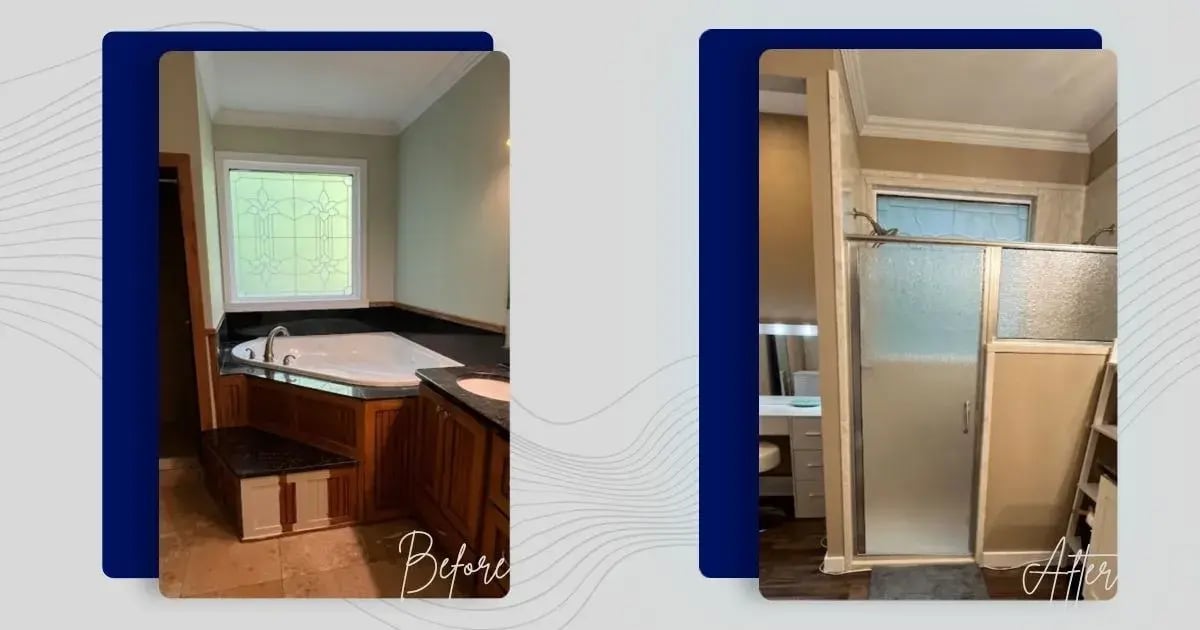
Why Joyce Uses a Multi-Step Bath Installation Process
A bath or shower remodel should be designed around what is behind the finished surface as well as what homeowners see.
Joyce's process focuses on:
- Removing contracted existing wet-area materials
- Inspecting the exposed space
- Addressing required preparation
- Installing a properly supported tub or shower base
- Using moisture-resistant backing
- Custom fitting the wall system
- Installing selected fixtures and accessories
- Sealing the completed system
- Completing a final walkthrough
Joyce currently provides bathtub replacements, shower replacements, tub-to-shower conversions, walk-in tubs, SignatureStone wall systems, and select bathroom-refresh options.
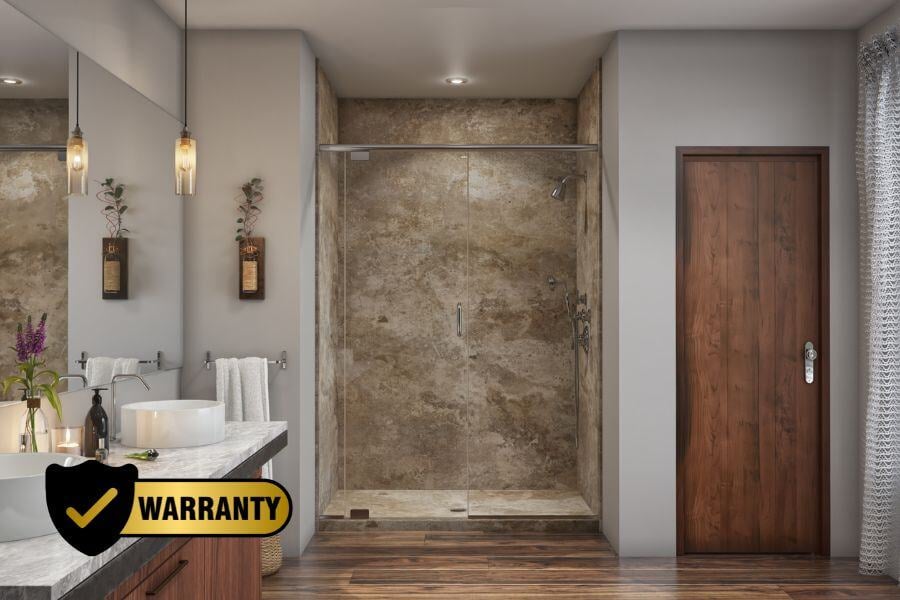
Joyce also provides a two-year labor warranty on qualifying projects, with product coverage depending on the selected bath materials and fixtures. Homeowners should review the written warranty supplied with their specific project.
Joyce serves homeowners across supported areas of Ohio, Pennsylvania, North Carolina, and South Carolina.
What Should You Ask Before Installation Day?
Ask your project coordinator:
- What is the expected installation schedule?
- What time should I expect the crew?
- Which entrance will they use?
- Do I need to provide a garage or driveway work area?
- What should I remove from the bathroom?
- Will the water be shut off?
- Will the toilet remain usable?
- Is the old bath or shower being removed to the underlying wall structure?
- What happens if hidden damage is found?
- Which plumbing work is included?
- Is custom glass part of the project?
- Will glass require a return visit?
- When can I use the new tub or shower?
- What cleaning products should I use?
- What warranty applies?
- Who do I call if I have a question after installation?
Clear answers before installation reduce surprises during the project.

Frequently Asked Questions
How long does a Joyce bath or shower installation take?
Many standard Joyce wet-area projects are planned around approximately two installation days. Older plumbing, hidden damage, structural repairs, drain relocation, custom glass, or broader bathroom work can extend the timeline.
Do I need to remove my old bathtub before Joyce arrives?
No. Do not perform demolition unless Joyce specifically instructs you to do so. The contracted removal and installation work should be handled as part of the professional project.
Do I need to empty the bathroom?
Remove personal items from the tub or shower, counters, floor, and nearby work area. Ask whether cabinets or other storage need to be emptied.
Will Joyce protect my floors?
Joyce's current installation process includes protecting the route from the entrance to the bathroom before active demolition and installation begin.
Does Joyce remove the old shower walls?
For its standard wet-area installation process, Joyce describes removing existing materials to expose the underlying wall area before preparing and installing the new system. Exact demolition scope should be confirmed in the contract.
What happens if water damage is found behind the walls?
The condition should be evaluated before the new system covers it. The installer should explain what repair is required and whether it affects the agreed price or schedule.
Will my water be shut off?
Water normally needs to be shut off during parts of plumbing work. Ask when and for approximately how long because the answer depends on the home's plumbing and project.
Can Joyce move my shower drain?
Some projects require drain adjustments, particularly tub-to-shower conversions. The complexity depends on the existing plumbing and floor construction. Drain relocation in a concrete slab may require substantially more work.
Does Joyce install custom glass shower doors?
Yes. Joyce currently offers custom-measured glass doors. Final measurements are taken after the shower walls are installed, so the glass may require a later installation appointment.
Can I use my new shower the same day installation is finished?
Not necessarily. Sealants, adhesives, mortar, or other materials may need to cure. Follow the installation team's exact instructions about when the shower can first be exposed to water.
What is SignatureStone?
SignatureStone is Joyce's stone-inspired bath and shower wall system. It is designed to provide a low-maintenance surface without traditional rows of grout.
Does Joyce provide a warranty on bath installation?
Joyce currently provides a two-year labor warranty on qualifying projects, while product coverage depends on the installed materials and fixtures. Review the written warranty for your project.
How can I estimate the cost before scheduling a consultation?
Joyce's Bath Project Estimator provides a ballpark price based on project type and selected options. Exact pricing requires review of the bathroom and final project scope.

Final Takeaway
Knowing what happens during installation can make a bath or shower remodel feel much less disruptive.
Before installation:
- Clear the bathroom.
- Create an open path through the home.
- Protect or remove fragile nearby decorations.
- Make arrangements for children and pets.
- Confirm bathroom and water access.
- Know what your written contract includes.
During installation, expect the team to move through several important steps rather than simply cover the old bathroom:
protect → remove → inspect → prepare → install → seal → clean → review
Most importantly, ask questions when something is unclear.
A well-planned remodel should leave you knowing not only what your new bath or shower looks like, but also how it was installed, how to care for it, when you can use it, what warranty applies, and who to call if you ever need service.
Ready to start planning? Use the Joyce Bath Project Estimator to see what your project could cost, or book a design consultation to review your bathroom, design options, installation needs, and exact pricing.
Topics:
